The Art of Science Writing, Part 2: Putting words onto paper (or, more likely, Word documents)4/20/2016

Last week we began our how-to-guide with the key steps that need to be taken before you start writing a manuscript. We stressed the importance of reading, both the scientific literature relevant for your field, as well as the benefits of personal reading outside of science. Reading ensures that you have key information fresh in your mind, and also shows you how other people write and construct a story. You will be the one that makes your own unique manuscript, but other manuscripts can show you what a finished product looks like in terms of organization and structure. We also went into some detail on making an outline, or if you prefer, a storyboard. This provides the framework you will build off as you start putting your story together.
Before jumping into the five steps for writing manuscripts, I wanted to touch briefly on your writing environment. I’ve heard some people say that they can only write in a certain setting, that they write better at home or in the office or in a sound-proof room, or that they have specific needs in order to get writing done (e.g., loud music, complete silence, endless coffee, bottomless pretzels, and really anything in between). It’s good to have a process in place or a tool that can help you write, but be cautious of getting stuck in the mindset of feeling like you can only write under certain conditions. There will be times in your day or your week when you’ll have some downtime, whether it’s 15 minutes or an hour between running experiments or going to meetings. If you’re thinking about ideas for a manuscript, write them down as they come. Even if it’s a paragraph that you only end up using a couple of sentences from, it’s important to get these ideas out there in a tangible form so you can rearrange and polish them latter. Writing is one of the most important parts of being a scientist. It documents both your thoughts and your hard work and transforms them into a story someone else can learn from-so preparing yourself to be ready to write at any time and in a variety of settings is an important career skill. Step 1: What’s the story, morning glory? Going back to Step 0, what do you have at this point? You have a detailed story board/outline of the relevant literature in your field, you have your figures in a mostly finished state…now what? Before you start taking that story board apart and fitting the ideas into text, write the last paragraph of your introduction. In our last post we mentioned that this paragraph describes the ‘Aim of paper, experimental objectives, and also list any specific hypotheses.’ But why do we start here? This is the core of your story: what you’re doing, how you did it, and what you thought you’d get. From a more philosophical viewpoint, this is also a key part of the scientific method, showing the progress between ideas and knowledge and how you use your work to generate new information to shed light on something not known before. To see this in action, I’ve included the last paper from my PhD, which ended up being one of my personal favorite papers, partly because of lessons learned the hard way in the first two papers. I’ve highlighted the key areas: 'The objective of this study was to evaluate changes in gene expression coupled with in vitro nuclear receptor assays to evaluate the androgenicity of water downstream of the paper mill on the Fenholloway River. Two specific aims were developed: (1) evaluate mRNA levels of vtg, 17βhsd3, and zp2 in the liver, shh in the anal fin, and global hepatic gene expression profiles associated with paper mill exposure, and (2) determine if chemicals in the Fenholloway River could bind to the ligand binding domain of androgen and progesterone receptors. We hypothesized that modulations in gene expression patterns and in vitro analyses would be indicative of androgen exposure and that global gene expression analysis via microarrays would provide insights into the mode(s) of actions of the chemicals present in the effluent.' The study wasn’t a complicated one, and I strove for clarity and simplicity in how I developed this paragraph. Work on this paragraph before any other part of the paper and have your PI or another graduate mentor review it for you. Then once you’ve got them on board with your idea, print it and keep it off to the side to remind you to focus around this core of the paper. Use this paragraph as a framework for your manuscript. As you write, you should be considering how to address the hypothesis/hypotheses using your specific aims and project objectives. Step 2: Start from the middle Once you have the last paragraph of the introduction, you’ll actually want to go to the middle part of the paper next. In the case of your manuscript, the introduction is the beginning of the story, the methods/results is the middle, and the discussion is the end. So before jumping back into the introduction, finish the figure captions and write the materials and methods section (as an added bonus, these are also the two easiest parts of the paper to write). A methods section is essentially structuring your lab protocols and procedures into a narrative form—keeping the most relevant parts in the narrative and citing other papers/protocols to keep the section from becoming too long. Writing this easier section first can help you get into the writing ‘mood’ and can also remind you of exactly what you did in the lab before you write about it. For the results section, keep this to a very cut-and-dry overview of what each figure depicts. This part of the paper shouldn’t include data interpretation, just evaluation. As you’re writing these middle sections, go back to your specific aims and hypotheses and see what the data say about them. Work on these questions and use them to help guide what you say in your results section and also to frame what you’ll bring up in the discussion:
Step 3: Set the scene Now we’re ready to move to the introduction. As we said in our previous post as well as our perfect presentations post, the format of the introduction is presenting a specific problem, its overall importance, and your approach to solving it. We also talked last week about how the outline can look for the introduction (and you already have the last paragraph, so we took that one out): - Paragraph 1: What is the problem and why should the reader worry/care about it? - Paragraph 2 (and maybe 3): What’s been done to address/know more about the problem so far - Paragraph 3/4: Knowledge or tools that can be used to further address the problem With your outline already sorted, you should be able to fill in a few sentences about each idea. The first paragraph should give a short overview of the problem at hand, including definitions and explanations of key concepts in your research area. This is especially important for people outside your field—those who work in this area will likely skip over this part of your paper, but someone unfamiliar with the tools and concepts you’re looking at will need to get a big picture understanding of your work in a single paragraph. For example, if your work is looking at Gene X and its role in the immune system and how it impacts cancer drug effectiveness, you don’t need to give a broad overview of how the immune system works, but someone coming from the field of neurobiology should be able to understand the basics of what type of study system you’re using and why it’s of relevance for your work. The second (and potentially also the third) paragraph will be more of a short literature review, which you can expand on more in the discussion as needed. Avoid dumping all of the existing ideas or possibly relevant literature in this section, since it will make it an unreadable series of facts. Start by simply asking ‘Who else is working on a similar topic to mine?’ and work out from there. You don’t need to cover everything slightly related, but for example of Gene X immune system-cancer drug cross-talk, you can summarize the current basis of knowledge for other genes that related to system-drug cross-talk and how your gene emerged as a potential candidate for further study. The length of this section will depend on you, your PI, and also the publisher, if they happen to have limits on the total word count or a word count per section. If it’s on a total word count basis, keep this section shorter and use your words in more important sections such as the discussion. Step 4: Bring it all together If the last paragraph is where you start writing for your introduction, the first paragraph of the discussion is where you start writing for this last section (confused already?). This leading paragraph of your discussion is what’s going to set up this crucial section of your paper and tie your new results and previous results all together. In this first paragraph, go back to your specific aims and hypotheses. Describe what you found out through the study in the context of your initial hypotheses, and give a step-by-step overview of what you just presented in the paper. Going back to my PLOS one paper, here’s how the discussion section started out: 'We found that masculinization of female G. holbrooki continues to occur in the Fenholloway River. Paper mill effluent exposure is associated with both anal fin elongation as well as with significantly increased bone segment formation at this site. Additionally, we found an increase in the mRNA levels of vtg, zp2, 17βhsd3, and shh in Fenholloway River G. holbrooki. Through comparison of hepatic gene expression patterns to data from laboratory exposures, we found that paper mill effluent exposure resulted in an increase of genes associated with metabolic pathways, with 62 genes similarly expressed by G. holbrooki exposed to androgens, indicating a similarity between impacts at the molecular level between paper mill and androgen exposure. We also found detectable levels of both AR and PR ligands in the transactivation assay in concentrated water samples collected from both the paper mill impacted and reference sites.' This opening paragraph can set you up for the rest of the discussion very easily, as you’ll have essentially listed out a topic for each following paragraph in the discussion. In each paragraph, think about how the results you saw fit in with key experiments from the literature and try to connect the two. What proposed pathways or models exist to explain both your results and data already in the literature? What potential ideas could explain discrepancies between your findings and a similar study by another group? It’s in this section that you’ll need to put the most work, which is why it should be saved for the almost last bit of writing. As with writing anything, though, the one thing you don’t need to do is get it perfect the first time. The discussion is generally the hardest section to write because it requires synthesizing all the results as well as developing new ideas and explanations for what you found. Trying to put this all into writing is not an easy task-but one that you should still give a go anyways. If you feel stuck, try to go one paragraph at a time and send that paragraph to a colleague or mentor to review. Get some feedback from them as to if you’re on the right track, if your scientific logic has any holes, or if there’s a different way you can structure your arguments. The best way to learn how to write is to try, and then try some more-so if anything, don’t be afraid to put words on paper and see how it goes! Also, don’t be afraid of a discussion that goes too long, at least in the pre-submission stages. You can always cut back, and your paper co-authors will likely also have ideas of what should go where and what’s relevant, so feel free to send them a lot and let them cut back as need be. While you as the lead author will do the bulk of the work, don’t be afraid to ask a co-author for additional editorial guidance, especially if they have good paper writing experience. Step 5: Tie up the loose ends While you’ll probably have to come back to your paper after your initial few drafts after your co-authors take a look, there are other things you should make sure are good to go before you finally click ‘submit’. Literature cited: Main hint here? Use a reference tool! If you have access to EndNote then there is a very easy-to-use plug-in; if not there are other free platforms (such as Mendeley) you can use which also have Microsoft Word plug-ins. Whether it’s a long or short paper, regardless of how many references you end up having, using a reference tool will take the tedium out of this section, and will also ensure that everything’s cited in the correct format. Tables and figures: Each journal should have a guide for authors which will specify the types of files supported and any minimum compression sizes/methods for figures. Remember that these are the part of your paper that people will often look at first-so make sure they are clear, accurate, readable, of a high technical quality, and, of course, stylish. Acknowledgements: Be sure to thank any lab mates, technicians, or colleagues who helped out with the project but who didn’t do enough work to make it to the author list. If you have co-author who works in a company or government institution, they will likely have to include wording to reflect that this paper doesn’t reflect the companies views (they will probably add it themselves but you can make a note to ensure that they included it). And don’t forget the funding agencies who sponsored your soon-to-be published study! The key thing to remember about writing is that you won’t get it right the first time around. It takes practice and a lot of trial and error, which can leave you feeling like you’ve been stuck on a paper for ages. That being said, writing is a chance to enable ideas to grow and change over time as part of the creative process, which can bring depth to your arguments and your story. You won’t get a perfect paper the first time around, so envision your time spent writing as constructive practice towards future perfection (or at least publishable perfection!). 
We’ve previously touched on writer’s block, and the strategies and tips you can use to get over the initial hurdle of the blank piece of paper. This week I’ve been inspired to revisit the topic of writing, in part because of my own return to science writing after a bit of a break. I greatly enjoyed writing in grad school, perhaps in part because I knew that writing before the end would help me finish my dissertation, but found that picking things up and getting in ‘writing’ mode again after almost two years of lab and computer work as a post-doc was a difficult task. Where do you start when you have nothing but a blank page? How do you go from a few figures to a draft of a manuscript?
As we touched on in our previous post, there are a few ‘blocks’ to get around in order to let the creative juices flow. Just as with presentations, there is no such thing as being held back in your writing by being a bad writer in science. You may not be a naturally prolific writer (just like I am not a naturally confident public speaker), but the great thing about writing in science is that if you stick to a plan and have a goal with what you want to write, you can always get there. In science, it’s not about how big your vocabulary is or how similar your writing is to the great novelists of the 21st century: it’s about sharing your story with clarity and enthusiasm, all laid out in a logical and progressive manner. So don’t let being a ‘bad writer’ bring you down or become a common excuse for you to avoid writing. As with our easy* steps for a perfect** presentation series, we’ll detail a step-by-step guide to writing, focusing on how you can go from a blank piece of paper to a respectable draft. But instead of calling this the ‘Five Easy* steps for a perfect** paper’, this series will focus on the art underlying science writing. Because in reality, art isn’t only about fanning those flames of creativity, it’s also about getting your tools ready, doing some preliminary sketches, and having the technical knowledge to bring your vision to life. You can’t just be a good artist to make good art—you have to put preparation and thought into the works you create in order for them to be impactful. Step -1: Read! Just as with our presentation guidelines, there are things you can and should do before you begin writing a manuscript, grant, science blog, or really anything short or long related to science and to your work. Before you can begin to write and become a better writer, you should read and work towards becoming a better reader. Obviously you’ll read a lot of papers that are relevant to your work, but how many times do you actually read a paper versus just looking at a couple of relevant figures or glancing over the methods section? If you want to see how science writing works, you need to read the results of science writing. See how manuscript authors lay out their story, how they bring together figures and results to a cohesive conclusion, and what works and what doesn’t in terms of style and structure. You’ll likely find more than a few bad or boring papers in the bunch, so when you do find a paper that sticks with you, keep it around: highlight the key points, see how they laid out their figures, and get a sense of how they developed their story. At the same time, learn how to critique a scientific paper. Focus on both the writing itself as well as the underlying logic. Do the findings they present match up with the conclusion they drew? Do the experiments they did line up with their hypothesis or project objectives? Were there any fundamental flaws in how they designed the study that weakens the conclusions they can draw? While you’re learning by seeing how others write, you can also take the time to become an evaluative, critical scientist, which is crucial at any stage of your career. You don’t just have to turn to the scientific literature for reading inspiration, though. Your job as a writer is essentially to tell a story: a story with a beginning, a middle, and an end. Just because your story is crafted on data instead of imagination doesn’t mean that the methods used by authors from outside of science aren’t relevant. Take a break and pick up a new novel or read a non-fiction book on a topic you’re interested in. How does the author keep your attention? How do they transition between ideas or paragraphs? What words or phrases do they use that stick with you? We pick up a lot of our vocabulary and our way of phrasing ideas from listening and reading, so by enjoying more good writing you can also become a better writer. Step 0: Make a story board Sound familiar? That’s because it’s the same piece of advice we gave in our perfect presentations series. Before you open up that dreaded empty Word document (or the boilerplate ‘.tex’ file for those Latex nerds out there), do some ground work and set yourself up for success by drafting your outline or, to use the analogy from last time, a story board. As with the presentation guidelines, the purpose of the storyboard is to provide some structure for your ideas and to let you be creative while at the same time helping you guide your creativity in a logical manner. So what exactly do you need to create your story board for science writing? Figures. These should be in a 90% final form before you begin writing your paper. Maybe you’ll add something else in that was initially lacking, maybe you’ll change the label on some axes or change the color schemes, but overall they should be static the moment you begin writing. The figures should be able to tell a story on their own, the story that you’ll craft into words around these core figures. You may think that the place to start with a manuscript is the introduction, but in reality you should focus on your figures before thinking of any other part of the paper. If you are a pen-and-paper type of person like me, print off each figure as its own separate sheet of paper. Around the sides, make notes about the figure. What do the bars show, on a very basic level (e.g. ‘Number of eggs per brood’)? Is everything labeled appropriately? Someone should be able to look at the figure, even without the caption, and have a basic understanding of what’s going on (such as ‘ok, there’s an increase in the number of eggs based on the dose of the treatment’). Once you’ve had a thorough evaluation of the figures themselves, draft a caption for each one. Start with bullet points of the take-home messages for each figure. What does the figure show, on a more advanced level (e.g. ‘Differences in nutrient uptake in treated versus control animals’)? What should someone understand about this figure that they can’t figure out just by looking at the image itself (such as how many replicates are in each measurement)? Take these bullets as the starting point for your figure caption, and when back on your computer go ahead and write a full paragraph for each figure based on these bullet points. So now you’ve now got your figures and figure captions, which in reality what most people will turn to first in your paper-so you’re off to a good start! Experimental protocols. Once you know the basics of what you’re going to show with your figures, start working on an outline for your experimental methods. This is generally the easiest (and also most boring) part of a paper, but from a scientific perspective is the most crucial. As you put together all of your relevant figures, dig out your lab notebooks and protocols to get all the details of your experiments. Make note of any steps of an experiment that fall outside the scope of a more standard operating procedure, or if a group of samples from one analysis was processed in a different way that the others. Have your lab notes and protocols on hand and give them another read-through before you start writing. You can also look at methods sections from other manuscripts (even ones from your own lab) to get a feel for what information is important and what is superfluous. But be careful not to just copy-paste the methods section from another group’s manuscript, or even your own group (or your own previous manuscript). Even without any malintentions, simply reusing a section may be plagiarism or self-plagiarism. Rewriting the methods section ensures it is current, and it may end up being more clear or concise. A pile of papers that have already been read. This is again a spot that can trip people up in the writing process. Once you’ve got your figures and protocol in place, the next step is to think about how to craft the story around them. You used the protocols to generate the data that you’ll present in your figures. But what’s the contribution to the existing body of knowledge? What’s the context of why that work was done, and how does it fit into what other data is out there already? How does this help your field understand a problem/scientific question? As with step -1, it’s hard to be a good writer if you don’t read. And while you may have a basic understanding of what’s going on in your field or within this topic, you need to take a closer look at the literature before you start writing in order to craft your story and lay out the logic in the most appropriate way. So before you start writing, read in detail any of the manuscripts that you’ll most likely cite: the papers with the experiments that inspired your work, the papers that did similar types of experiments but with perhaps different systems or questions, and the papers that challenge your result at some level. Even if you’re read them already, read them again and make notes on the important findings or concepts that you’ll need to construct your paper. Once the literature review is done, you can use this pile of knowledge to construct your storyboard. Think of your introduction and conclusion not as two separate components, but instead as a continuation of one to the other. The introduction is the beginning of the story, the methods/results is the middle, and the discussion is the end. In your introduction, you set up the coming tale. As with our presentation guidelines, you can use the following format: your paper, just like your presentation, isn’t a series of facts, but is instead a means of presenting a specific problem, its overall importance, and your approach to solving it. You can consistently keep this to anywhere from 4-5 paragraphs by using the following layout: - Paragraph 1: What is the problem and why should the reader worry/care about it? - Paragraph 2 (- 3): What’s been done to address/know more about the problem so far - Paragraph 3/4: Knowledge or tools that can be used to further address the problem - Paragraph 4/5: Aim of paper, experimental objectives, and also list any specific hypotheses The methods and results section are pretty cut and dry, and don’t need much of an outline apart from what’s in your experimental protocols and the bullets you jotted down while working on your figures. Keep any specific or detailed interpretations of figures (such as ‘the decrease in egg production is related to an increase in temperature’) for the discussion. The results section should be very cut and dry, with one paragraph of results per figure. Focus on the basics of what each figure is telling you and save the juicy, exciting bits about what it all means for the discussion. In the discussion, you continue the story started in the instruction, but now you have a new factor to accommodate for: the data you generated in the manuscript. How does your new data fit in with what was known already? Does anyone have data that disagrees with yours? Frame the discussion as a way of addressing the questions you presented in your introduction, how your results fit in with your hypothesis, and what the limitations/future directions of your work are. As you make your outline, put as many ideas, relevant citations, and things to mention in the paper in your storyboard as you can think of. You likely won’t use half of them, but laying out any potentially relevant findings can help provide context for what you should discuss and how you should frame your writing. One way to do this is to break down each paper into a series of bullet points. List out relevant methods, rationale, hypotheses, findings, and if you think results were interpreted correctly. Another alternative is to have bullets ranked by topic, and then list papers and relevant results under that topic, and see where the similarities/differences lie. I’ve tended to use a mixture of both, and then while writing used color-coded notations to help me keep track of what sections were written where. For my own dissertation, before I began writing the introduction and conclusion sections, I first laid out the literature and the key points I wanted to address in a very long outline. While in the end I only used about half of what I put into the outline, when I was ready to begin writing I was able to jump into it quickly, without having to go back and forth between reading and writing and disrupting the flow of my ideas and thoughts. Being ready to write means being more efficient at writing, because you can let your ideas come to life without having to jump back and forth between different tasks, thoughts, or distractions. It may seem like a lot of work before you even start writing more than just a few bullet points. But think about it this way: How much preparation work do you put into a big experiment? How much time does it take you to code something that’s never been done before? How much washing, chopping, and reading recipes do you need to do before you cook a nice dinner? A lot of the things we do, both in lab and in life, take a lot of pre-work in order to come out at a high quality and to be done efficiently. The work you put in before you start writing will allow your work to take off once you are ready to get started-and will make the task less tedious and tiresome, since at that point all you’ll have to do is to tell the story. Next week we’ll go more into detail of how to take the outline and figures and construct a story around them. Until then, happy storyboarding! 
The great philosopher Led Zeppelin has always has a way with words:
In the days of my youth, I was told what it means to do science, Now I've got a degree, I've tried to learn important facts the best I can. Memorized and synthesized and learned the entire Krebbs cycle too, [Chorus:] Good meetings, Bad meetings, we know you’ve had your share; When my attention span wanes after 3 hours, Do I really still need to care? As a career scientist in the modern era, you have numerous jobs besides being a scientist: you’re a project leader, teacher, motivator, finance manager, accountant, PR manager, public speaker, fundraiser, and personal secretary. In an ideal world, you could concentrate on doing your science, writing papers on your own at your own pace, and spending most of your day in your office or in the lab thinking about new ideas and bringing them to life. In reality, you have to manage your own tasks while working with others on large multi-organization projects, engage with collaborators to write new grant proposals, and be ready to work as a team to get something finished that would take you ages to do on your own. While we know the type of science needs to be done to make progress in our understanding of the universe, it’s not always clear how to do the necessary thing that will enable scientist to do this great work. One of the essentials is learning how to work in groups, and part of that is how to lead productive group work. Unfortunately we all know too well what a painful, unproductive meeting feels like: the project meetings where one person drones on endlessly, a conference call that was scheduled to last an hour but has already gone for an hour and a half with still three agenda items to go, or a club at your University that meets every month and always talk about the same thing with nothing getting done. It may seem more productive (and enjoyable) to avoid meetings altogether, but disengaging from work groups will put you at a huge disadvantage. Part of being a scientist means collaborating, and part of collaborating means you engage in group discussions. If you avoid them now but then end up in a project leadership position down the line in your career, will you know how to make an agenda? If you miss out on key discussions with a group you’re involved in, will you know how to make the group’s activities more impactful for both the group and your own career? If you skip out on face-to-face meetings on your project, will you know how to respond in a work setting when your boss turns to you in a group and asks ‘So, how does your project fit in with our 10-year plan?’ Learning how to be involved in group activities, as well as how to deal with groups that may not be going in an ideal direction, can set you up for success in your future career. Knowing how to lead a small group of people effectively and efficiently is a huge skill for any type of research position with leadership or management responsibilities. Honing the art of finishing a conference call on time, while still covering all the key discussion points and doling out action items, can help lead you to more papers and more grants. Regardless of what sector you end up working in or at what stage of your career you find yourself, learning how to manage and work in groups can bolster your own project’s productivity—setting you up for future success on a wider scale. What makes a group or meeting effective? - Having an overall goal. Above everything else in this list, a clear and well-understood goal is the key to making any group effective and to make any meeting productive. Whether it’s a conference call about a draft manuscript or a graduate student society group at your university, there should be an understanding of the goals and objectives of your group’s activities. The goal doesn’t have to be complicated-it can be “To write a paper by May 2017” or “To organize events for graduate students at our University on a regular basis”, but doing anything without a goal in mind can lead to tangential discussions and unproductive meetings. Having a goal doesn’t mean everyone in the group will simultaneously know the process to achieve the goal. If the goal is simple then the process is easily understood (e.g., if the goal is to write a paper then you get there by writing the damn paper), but for more nebulous events like lab meetings the goal or process can be unclear. Are you there to give an update to your PI on what you did each week? Or maybe to summarize a month’s worth of findings as part of a longer presentation? Or does your PI simply feel that your group ‘needs’ to have a lab meeting and you end up suffering each week through two hours of the same rambling comments as the week before? Identifying the overall goal and how to get there can alleviate the need for long, drawn-out discussions or just meeting ‘because we should’. - Clear expectations of who is doing what task. As with having a goal and knowing how to get there, an important part of group work is actually doing the things you talked about in the meeting. It’s great to generate new ideas, but leaving these ideas on the table without a clear picture of who will take up what charges can lead to you coming around to the same table again in a month’s time with nothing new to discuss. In a formal meeting setting these are usually drawn up as ‘action items’, but if you are feeling less formal you can always just refer to them as a to do list. Drawing up this to do list is usually the job of the group leader, but if your meeting is more informal you can help in productivity by offering to keep track of action items and who is responsible for which task. You can then link these tasks back to the goals of the group and see if what the tasks contribute to achieving the initial goal. If not, then the task can be considered less of a priority. - An engaging leader who listens and directs. Leaders have to take charge and direct, but they should also be good listeners and people who get other members of the group to engage. At the same time, they should be people who keep tangential discussions to a minimum and will change or redirect the topic as needed. Depending on the type of group, this could be either an elected or an informal position, and most of the time you won’t get to pick who this person is. If you feel like a group you’re working with is lacking in this type of leader and also doesn’t have a formal set-up for who directs the meeting, feel free to talk to the group members and give it a try. Offer to lead a conference call or a lab meeting and see how it feels to direct conversations and discussions. At some point you’ll have to do this kind of work anyways, so ‘practicing’ in a less make-or-break setting can help when you do have to take a lead on a project that directly belongs to you. - Deadlines that aren’t arbitrary but can still be flexible (to a point). No one likes deadlines, but they are a part of working life and should be ascribed to whenever possible. That being said, a good way to motivate your group is to have deadlines that mean something. Instead of ‘Finish your part of the proposal this in by Friday because we need to finish it,’ spin it as ‘Please get this to me by Friday so we can send the proposal to the University Organizations committee for consideration next week’. This shows the group that what you’re doing has a reason for needing to be done when it should be done, and isn’t due to your own personal whims or schedule. There will always be a task or two that falls behind schedule, whether someone forgot about what they were supposed to do or had an unexpected trip or other deadline turn up. If you’re active in the group, be ready to help out and get other tasks done that really need to be done, and if someone crucial is being slow then be ready to remind them a few more times before handing off the task to someone else. - Participation from all the players, not just the leader or a select few. This is where both you, as a participant, and the leader of the group come into play. A good leader should not only listen, direct, but also ask for feedback and participation from other group members. People may not always volunteer opinions or offer to help with a task. If you know someone has something good to say or might offer some support for a task that needs to be done, asking that person directly is a good way to get them involved. That way it’s not just the outgoing ones that get involved with the work, but the quieter ones that may not want to speak up in a group setting. You can also follow up with them after a face-to-face meeting by email, where less outgoing people might be more comfortable expressing themselves. - Celebrate successes and learn from mistakes. As with the rest of your scientific career, the success of groups you are involved with will be a mixed bag: some things will work fantastically, and others will fail miserably. A successful group is one that takes the good with the bad, and one that celebrates and thanks its participants for achieving good work, and looks back and tries to learn from the things that didn’t work out. So now that you’ve got this list, every meeting you go to will be a good one, right? Right? Unfortunately bad meetings are a part of life, no matter what type of job you have. But you can make bad meetings better by putting this list to practice: by encouraging your group members to have goals, to think about leadership styles and engaging all members, and to help out when you can in getting ideas off the ground or moving on from a topic that’s been droned about. Even group members who aren’t leaders or organizers can have a huge impact on productivity, and actively participating and getting others engaged can help you get remembered by the folks in charge. And with that we’ll close off our post with The Zep, who more than anyone knows you’ve had your share of good and bad. But yes, you do still have to care, and by caring you can help take a meeting from bad to good. Just think of all the times* you could listen to Stairway to Heaven if you help bring a meeting to a close in a reasonable amount of time and get an extra 30 minutes in your day? *Approximately 3.75 
We’re taking a break for the time being from our research entourage series, with the final installment to be delivered next week, due to a slight change in how I’ve spent my spare time writing. I’ve been sending off a flurry of job applications, with more to be done in the following days, due to some uncertainty in my project’s contract extension. The year started off with positive news, and a draft of the contract even made it to the University to be signed by our legal team. But with industry budgets being as they are it was soon on the 2016 budget chopping block, and my fate went from certain to unknown (cue dramatic music!!). While I’m still duly optimistic about my project’s fate, I’ve also recognized the risk of my current post-doc project money ending in June and having nowhere to go but to begin my blues guitar career at the Liverpool Docks.
Initially I felt really uncertain and nervous about my prospects and a bit lost at the thought of looking for a job when I thought I would have another year until I needed to start. It was at this low point that I followed my husband’s recommendation and started reading ‘The Alchemist,’ the story of a young shepherd from Spain who sets out on a quest to find his treasure, buried in the pyramids of Egypt. Along the way things range from going really great to sucking pretty badly, with everything from successfully evading desert henchmen to getting all of his money stolen the first day he arrives in a city. In the book, there is a lot of talk of finding your Personal Legend, with it frequently mentioned that ‘when you work for your Personal Legend, all the universe conspires in helping you to achieve it.’ I thought about the shepherd these past few weeks, a person brave enough to leave his happy home and venture forth for his dream. I pondered if by changing my mindset at this potential juncture in my life that looking for a new job could feel the same way. While I am still nervous about what happens next, I am trying on a new attitude for my job hunt: envisioning the search as an opportunity to think about what I want my career to look like next and what I can do to get there. While working out exactly what my Personal Legend is will probably take a while, in thinking about my current career and where I want it to go in the future, I’ve realized that I like research, but don’t always love it. I enjoy doing good work and in working hard, I enjoy making connections, and I enjoy talking about research and hearing other people get excited about my work or their own. In looking back on the moments of my own career that stood out the most, it wasn’t the number of publications or how many people attended my conference talks: it was bringing ideas and findings together to tell a story, and it was listening to other people’s excitement and enthusiasm about science that kept me at it. For this reason I’ve decided not only to look for post-docs or research-oriented positions (as I still enjoy what I do and want to keep doing it while I can), but also to keep an open mind and send in a letter (or seven) for science outreach, public engagement, and science writing positions as well. It might be a tough sell in terms of my experience vs what other more traditional candidates bring to the table, but I figured it’s worth a go, and might even lead me to my own bit of treasure at the end of the desert (someday, at least!). And while it may seem like a long-shot at the moment, I’m not the first person with a Ph.D. who’s thought about doing something else, so if other people can do it then so can you (and I)! As I go through my own rounds of applications and cover letters, and trying to keep myself motivated and not become overly pessimistic about the situation, I’ve come up with a few talking points on how to get through the job application process. I’ll refer to them as talking points instead of tips, since ‘tips’ would imply previous success, which in my case has still yet to be determined: - Never stop looking but keep your focus. I have a favorite couple of job websites that I peruse on a bi-weekly basis; if you're in the UK and looking to stay in academia or a university setting, then jobs.ac.uk is a great place to start. If you have a university or area in mind and are looking for academic prospects you can also check directly on a university’s website. I have a tendency to just start opening tabs on everything that sounds vaguely promising, but then make it an effort to select the best few and make a note of when the application is due so I don’t miss the deadline. It keeps me aware of the jobs that are out there, with new ones coming in to my view a weekly basis, but in the end I don’t apply for all of them and instead focus on ones that seem the most interesting or the best match to my profile. - Don’t be afraid to go outside your comfort zone, or qualifications. You can easily tell if you’re not qualified for a position if they name an essential degree or X number of years of experience that you don’t have, but for a lot of entry-level type of work, the requirements are a bit more vague. Even if you feel that your application would be a bit of a stretch—for example, maybe the position is in the health sciences and your degree was in Ecology—don’t be afraid to go for it anyways. You can highlight the other parts of your profile that are a strong match and how your unique skillset is a good fit for the role, even if you’re not a 100% match on paper. The good news is that if you over-extend yourself, it’s not going to come back and bite you. You won’t get in trouble or have to pay any application fees if you apply for a job you don’t get. And if you never applied for the job in the first place, you definitely wouldn’t have had a chance. So the odds are in your favor to just go for it and see what happens! - Read the post in detail and learn about the company/organization. You only get a resume/CV and a cover letter to get your foot in the door with an interview, so how you set things up and the words you use really matter. If the position calls for a specific technical skillset, then make sure that’s clear and upfront on your CV. If the job is looking for someone with managerial or leadership experience, put any work you’ve done in extracurricular leadership, volunteer activities, or certifications/courses that fit the role. If the job description mentions that they need someone who’s good at ‘strategic planning,’ then bring this phrase into your cover letter with a short description of how it applies to you. Having the key sections or phrases laid out for the application reviewer to see easily can give you a leg up when it comes to making the first cut. - Have someone critique your letter and resume, and if possible use a different person each time. Before you send your carefully crafted letter and CV, have a friend or colleague take a look at it. And by ‘friend’ we don’t mean your friend who tells you that everything you do is full of sunshine and rainbows. In this situation, you need a friend who will be honest in telling you if the way you phrase something doesn’t make sense, if your letter is too long/too short, if things need rearranging, etc. Having a friend with a critical eye at this stage can help you beat the more severe critics later on down the line. If possible, for each letter try to get two people to read it over, as having another perspective can help you find things that aren’t clear or readable, and your second reader may find something that the first one missed. - You’ll get a lot of ‘We regret to inform you’ replies…and that’s OK! Even when it’s a job you weren’t really that excited about, getting the email that you didn’t even make it to the interview stage will deal a small blow to your motivation and confidence. Unfortunately, part of the process of applying for jobs involves not getting a lot of the jobs, and being constantly rejected is not something that any of us enjoys. It is frustrating, but it’s just part of the process. I recently heard that a friend of mine from grad school who recently became a professor went through 17 unsuccessful job applications before he got his current, tenure-track job. I’m sure none of those 17 rejections was fun or desirable, but in the end he got to somewhere good and likely learned a lot about the process along the way. - Get feedback if you can. Whether it’s an application that didn’t get through the interview stage or you made it to the interview but didn’t get the position, ask for feedback on yourself and your application. You might not get feedback every time, but when you do, the information can be helpful for figuring out what you need to address or bring forward more in a future application. Just like with the amount of rejection you’ll likely encounter, it will be hard to read critiques on you and your work, so try to look at the words as a means to move forward and to grow from the experience as a whole. - If you have a type of job in mind, do some informal interviews to get some behind-the-scenes info. Sometimes the key to getting into a new field or area of research is to get info from someone behind the front lines. Especially if you have an idea of where you’d like to end up, find a mentor from your own network or cold call someone from your university/city that has the job you’d like to have someday. Set up an informational interview with them, where you can ask questions about what their job is like, how they got there, and what resume reviewers in the field are looking for as they go through pile of job applications. It won’t guarantee you a position anywhere, but having some inside information on how things work and what’s important in the field can help you have a leg up when it comes to structuring your application materials. - Don’t forget to talk to your references beforehand. Your personal references likely won’t be contacted until later in the application review process, but before you click ‘submit’ make sure to ask them if they can be a reference and let them know the type of jobs you’re applying for. There’s not a lot of things more embarrassing then having a prospective employer call a personal reference and surprise them with news of your job searches and questions about you and your working style. With this week’s shorter post to set you on your way, I’m back to juggling job applications while doing what I need for my current job, and looking forward to the day when I can have my writing brain back in full again. Until then, I’ll keep on putting myself out there, learning from applications that didn’t make the cut, and staying optimistic (as much as possible) in the face of what I’ll refer to as a life opportunity instead of a career challenge! If you’re interested in additional discussions or have a question about career transitions, you can join the #withaPhD chat moderated by Jennifer Polk on Monday Feb 22nd from noon-1pm EST on the topic “Surprising jobs and careers.”
With the holiday season rapidly approaching and with the stress of year-end work diminishing everyone’s immune systems, it’s time to be on the lookout for any signs of impending sickness in you and your colleagues. In addition to the cold or flu, the stress of finishing the year while reflecting on your work in the lab can bring about an ailment known as ‘imposter syndrome’, a common condition among academics and researchers ranging from graduate students to full professors. While there is no complete cure for this ailment, with this guide you can recognize the symptoms and prevent any unnecessary flare-ups that may cripple your productivity and/or your Christmas spirit.
What is Imposter syndrome? A sufferer of imposter syndrome feels that they are unable to fulfill their career goals, that any accomplishments they have achieved are due to dumb luck and not to skill or level of expertise, and that they are simply not cut out for a career in research because they are not as smart/skilled/outgoing as their colleagues. The holiday season offers a time to reflect on the year behind and a chance to prepare for the year ahead. It also entails finishing up lab work, writing up end-of-the-years reports for projects, and having to place orders and spend grant money before the financial office closes, which can compound the normal stresses already surrounding the holidays. Scrambling to get things done before heading home for the holidays can leave anyone with the feeling of ‘Why am I doing this all NOW?’ and ‘What exactly have I been doing all year?’. These questions then create a prime target for imposter syndrome and its counter-productive symptoms. What are the symptoms of imposter syndrome?
In addition to the rushed and hurried lead-up to the end of the end of the year, time spent reflecting back can lead you to feeling like you didn’t do anything productive all year long. Maybe the year didn’t bring you as many results or papers as you’d hoped for. Maybe a crucial experiment for your thesis didn’t work the way you thought and you had to go back to the drawing board. Maybe you just went to a lab mate’s graduation party and realized how far away you still are from finishing your PhD project. These thoughts, coupled with the already high stresses of the holiday season, can lead to making one feel more like an imposter or a failure than during the rest of the year. It’s easy to look back at our own year of work and compare it to the work of other students, post-docs, or professors, and see theirs as being much more worthy than our own. But the comparisons aren’t always even, and depending on the field you’re in or the type of work you’re doing, there might be a lot of depth to your year’s worth of work that can’t be seen as easily by anyone but yourself. Think of an iceberg, where the part above water may look unimpressive but the real bulk of it lies beneath the surface. When you feel stressed about what you’ve accomplished in a year and feeling like you’re not worthy of this type of career, take a closer look under the surface. Maybe you don’t have all the manuscripts done that you’d planned, but you made nice figures for a recent conference poster and can use those and a few tables as the bulk of a manuscript. Maybe a big experiment didn’t work the way you thought it would, but it led you to a new direction that no one else has been down before. Maybe this wasn’t your year to graduate, but that doesn’t mean you didn’t do meaningful things in the lab that can give you strong momentum for the next year: optimizing assays, writing code, running simulations, going to a conference and hearing great talks and getting new ideas, doing a literature review for your thesis that helped give you a bigger picture perspective on your work. Not all of these things will have a tangible, surface-level impact, but they will provide the necessary depth of knowledge and support for you to start off the next year of studies and work with the tools you need to succeed. Graduate students and early career researchers are especially prone to getting imposter syndrome, as we’re in the point of our lives where we’re doing the day-to-day lab work required but at the same time thinking about possibilities for our future careers. When you struggle with trying to get PCR to work or spend an afternoon trying to understand one paper, it can be hard to look at a professor’s life and see yourself as able to do something similar. But take a closer look at the people we feel imposter syndrome about: They’ve spent quite a bit of time getting to where they are by doing the type of work that you’re doing right now, by running into problems and figuring out how to solve them, and now teaching you and your colleagues how to do the same (with some professors being able to pass on their lessons better than others). The work you’re doing now is not meant to tell you if you’re cut out to be an academic or a researcher or not, it’s meant to show you how the process of research works in practice and to provide you with your own depth of knowledge and support as you work and progress to the next stage of your career. You don’t have to be perfect the first time around to become a great researcher-very few of them got it right the first time, either, they just got good at not being wrong quite as often. In academia you work with the cream of the crop, researchers on the top of their game who are pioneering work at the very edge of technology and understanding. Academics have to sell their research and to conduct themselves in a very confident way, making them attractive for collaborators and funding agencies: Anyone looking into this field without that same level of self-confidence is likely to feel like they don’t belong. How can you treat imposter syndrome? Imposter syndrome has no cure, but you can take prophylactic measures to prevent flare-up using the following measures:
Prognosis Academics and researchers suffering from Imposter Syndrome tend to recover rapidly with treatment, although many will experience remission before retirement. Prognosis is generally good for those who prescribe to self-esteem building activities, personal development, peer interactions, and an optimistic outlook on the future. Best of luck to everyone finishing out the year. We’ll have one more post to close off 2015 and are excited for what’s ahead for Science with Style in 2016!
Greetings from the sunny Midwest of the US of A, relaxing at my parent's house after the SETAC North America meeting. After a busy week of science, networking, and some amazing Utah beers, the big conference is done, talks and meetings about future meetings and everything in between. While there’s still a lot to be done, coming back home from these conferences is always a refreshing experience, thinking about spending time with new colleagues and old friends and with new ideas and renewed motivation to spur me through the rest of the year.
As promised in a previous post, I wanted to finish off the tutorial for the five easy* steps for a perfect** presentation. I’m glad that the talk went well and that even when being placed during one of the last sessions of the conference when people are already heading home that there were a decent number of people who came to hear my talk. This post will focus on how I applied the lessons about the concepts of the story, take a bow, and break a leg to make the talk in the best way I could, even after a busy week of networking and meetings within meetings to talk about future meetings. 3. THE STORY I had previously finished the introduction part of my story board for a previous post, and once I developed an outline for what I wanted to say I went on to make the actual power point slides. While I had given a talk about some of this data before, this time I wanted to feel more confident with how I presented the introduction and took the initiative (and a few minutes outside of my lab work) to think about how I wanted to tell this story. While narcosis is not a new topic of interest either in SETAC or for Unilever, I hadn’t yet thought about how I saw the problem and potential solutions. And while there are other experts on narcosis out there, my goal with this talk was to present my perspective based on my own background reading and my own vision of the problem. I was much happier with how these slides came out than last time, and was glad to have taken the extra time to think about the problem and the solution(s) more in-depth as opposed to just saying word-for-word what someone else had previously said. With this revitalized excitement and a bit more ownership of my post-doc project, I found that once I made the introduction slides (which did take some time, with lots of new graphics and thoughts about how to display different pieces of information), the rest of the talk came more easily. It was just a matter of deciding which figures to show in the short amount of time I had and what was most relevant to show that addressed the questions I presented. For the methods overview and experimental background, I focused on using flow chart-style slides that depicted what questions I was answering with what analyses (see the end of the paragraph for the middle section of my slide deck). I kept these questions as headers of my slides that showed the results relevant for each section, in order to make it clear to my audience why I was presenting what I did. I avoided using tables or figures with really small font, because nothing is quite as awkward as presenting results that no one in the audience can see or interpret. Before the talk began I actually took out an entire slide because I realized during practice that it wasn’t adding anything to the presentation. I put the slide at the end of the talk as a back-up just in case there were specific questions related to it, and I found that when I took that superfluous slide out that the story flowed much more nicely.
4. TAKE A BOW
I’m in debt to my presentation co-authors on this one. Initially I had a rather messy slide summarizing the findings and listing all of the experiments we were planning on next. Thanks to a comment about the slide, I rearranged how I talked about future experiments to make it look more streamlined. I also gave a big-picture look at how the project fit in with Unilever’s aims and goals as well as the project itself. In the conclusions I presented here, I first focused on what did you learn about the problem? by breaking down results specific for the two questions I presented. Then instead of just listing out all of the things we could do for this project, I focused on looking at what still remains unanswered but is important for solving the problem? and how that fit into the overarching goals and objectives for the project on a wider scale. I also had a slide thanking co-authors and collaborators, which I prefer to see at the end of a talk as opposed to the beginning. It keeps the flow of the presentation more smooth and makes more sense logically to thank people that helped you out with a project after you actually talk about what that project is. In addition to the acknowledgements slide, I also include a second thank you slide to thank the audience and to have a holder photo or something visually appealing. I do this so you can transition away from the acknowledgements slide and have a holding slide while you answer questions. This doesn’t leave a distracting slide full of collaborator names to look at, and doesn’t force you to use the black screen that powerpoint gives back when you finish a presentation. During my PhD I used pictures from the field sites I worked at, or happy little mosquitofish swimming around, and now I enjoy highlighting my adopted home town of Liverpool and to make a comment about how it’s not always raining in England. One thing I forgot is to put my contact information and twitter handle on the last thank-you slide. This makes more sense than having it at the beginning, since it will be the slide that will stay on the presentation screen for longer than if it's at the first slide. Something to remember for next time!
5. BREAK A LEG!
Despite other scientists telling me that I’m a great presenter and having won a few SETAC platform presentation awards, I still get nervous and have a few moments of panic and self-doubt before any talk. Because my last talk on this project hadn’t gone that well, I was especially nervous and wanted to do really well, this time with a potentially much larger audience of peers and collaborators. No pressure! With all this in mind, I took the time I needed to practice my talk and to make sure that I had my transitions and talking points solidly in hand. I practiced the talk two times completely through, and realized after my first go that I had no idea how to start the talk. I spend time thinking about what precisely I wanted to say once I clicked off from the title slide, and once I had that sorted out I actually wrote down what I wanted to say just to get it more 'stuck' in my mind. I didn’t’ take down my notes up on stage but when I practiced the talk a second time I jotted down the key points that I wanted to be sure to say and things that weren’t clearly written on my slides. Writing them down during the practice, but not reading them from paper during the talk, ensured that I remembered them when needed without looking awkwardly at notes or index cards while searching for a thought during the actual talk. At the start of my talk I saw the lead author of a paper I cited, and a SETAC veteran and all-around nice guy, sitting in the audience. I thought he might show up so I acknowledged his presence in the room when I talked about his paper. Maybe a bit over the top but I feel it’s weird to talk about someone’s paper when they are sitting in the audience, so I embraced the awkward and said hi to the guy. (Follow-up note: He said hi to me after my talk and told me he really enjoys seeing where my work is going. Awesome!!). Final hurdle for the presentation itself: My talk was being recorded, meaning that all my collaborators and Unilever folks could watch it and listen to me after the meeting. The talk I subbed in for was also recorded at the last SETAC meeting, and I remember being horrified while listening to myself. I had a bit of a cold at the time and was sniffling LOUDLY during the entire talk, all captured on audio and immortalized for SETAC history. With that memory in mind, this time I made a quick dash to the bathroom to blow my nose before the talk and paid attention to myself as I spoke, making sure to do any coughs or sniffs away from the microphone. I think this time I sounded much better, but I’ll have to force myself to listen to my talk yet again and make sure I didn’t make some other strange noises to replace the sniffling. I also took a cup of water up to the podium with me and took one drink during the talk because I tend to have a bit of dry mouth from nervousness. I time my drinks so I don’t take too large of a gap in time between thoughts. What I normally do is grab the cup when starting a slide, hold it in my hand while talking through the slide, and then take a quick drink and set it down as I click to the next slide. It keeps the thoughts moving more smoothly but still allows me to give my parched throat a rest during the 15 minute talk. I was happy with how the talk went, and not because I did all of slides perfectly with no awkward sarcastic comments or mis-steps over words. I felt comfortable because I was telling a story that I had crafted instead of repeating what someone else had explained and said was important. I listened to advice from co-authors to help make the finishing slides more clear and concise. I recognized that I needed to do a couple of practice runs, even though this data was not brand-new, to make sure that the story came across accurately but was also interesting. That being said, I think I did make at least one sarcastic joke about my science hidden in there somewhere, which will soon become immortalized on the SETAC website for all to hear and enjoy. Maybe if research or style blogging doesn’t work out I can always take my show on the road as a nerd comedian. Wouldn’t that be a wonderful way to give back to the world... 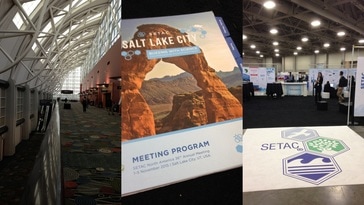
I've been meaning to write a blog post since the meeting kicked off on Monday, but as conferences always go there's always someone to talk to or some meeting to listen in on or a talk to attend. I'm taking advantage of a short break between coffee socializing and talking to students and exhibitors about the next SETAC YES meeting to write down some thoughts and perspectives on this conference.
This is my 6th time attending the SETAC North America meeting, and even as an early career researcher I'm always overwhelmed with catching up with people I knew from before while also making new contacts. It's great to be back as something of a scientific family reunion at this year's meeting in the clean and contemporary capital of Utah. Salt Lake City has been a great venue for this event and for my return back to the US of A after a year away, and a good opportunity to wear my autumn boots on this chilly autumn day! While I've been busy this week I've managed to come up with a few thoughts and suggestions to help make the best of those fast-paced and exhausting conference days: - Be comfortable. I yet again made the mistake of wearing heels on the first day of the meeting. I followed up the rest of the meeting wearing my favorite broken-in Lacoste black trainers, and while I may have looked more casual I felt more comfortable and more like myself. When you feel comfortable you can act more like yourself and let the more important things shine through, like your passion for your research or your presentation skills. We tend not to wear conference clothes all of the time, with shoes not broken in and dress pants we haven't worn in a year. Instead of just dressing up, focus on embracing your style while still conveying a professional look, attitude, and how you carry yourself. And if you can stand and talk to a new contact without shifting awkwardly in shoes giving you a blister, you can make the focus of the conversationmore on you and your ideas and less on what you're wearing. - Let ideas happen. I spoke on Monday to Namrata Sengupta from Clemson about the Clemson What's in our Waters (WOW) project, which I'll feature in a future blog post talking about outreach projects at different universities. This idea first came about over drinks at a previous SETAC meeting. It wasn't from a formal sit-down brainstorming session but just came about while sitting around with friends and colleagues talking about what would be fun, useful, and engaging for undergrads. At conferences we all get busy thinking about our own presentations, project meetings, and talks we have to go to, so be sure to leave time for creative endeavors and new ideas to take form, which often times don't take place in a board room but at a pub or over coffee with friends. - If you're at a loss for words, ask where someone is from. I love doing this because it can always lead to a story or a shared experience. Maybe you've been on a trip to where someone grew up or you happened to go to nearby universities for undergrad. It's interesting to see where people go and where they came from throughout their careers, and it's an easy conversation started since everyone you meet is always from somewhere. One exhibitor even made a word association game out of it, asking people what the first thing they thought of when they heard 'Texas'. It was a bit more boring to do that the opposite way for me and ask people what they thought of about Nebraska. Yes, it is flat and yes, we have corn. - Take notes! I'm in a slight crisis at having lost my original program book, after I wrote down some ideas and follow-up tasks during an organizational meeting. Now I thankfully have my trusty green idea notebook back at hand and have been jotting down impressions and ideas from this meeting along the way, without needing to rely on the intermittent wifi connections. You'll meet so many people and hear so many ideas, so write them down before you forget them! I also write down a couple of words about someone if I take a business card, whether it's what we talked about or what I wanted out of a follow-up, just so I don't end up with a pile of names and affiliations after a long week of talks and meetings. - Minimize your screen time. The hardest part about being a blogger at a meeting is that I don't want to sit by myself and blog! There are so many colleagues and new people to talk to that I hate the thought of isolating myself to write. For me, writing is a way to relax a bit and recharge after a lot of social and professional interactions, so forcing myself to think and write during a break in the meeting was a good exercise. It can be tempting, especially for us introverts, to want to spend too much time on your phone or computer or to make excuses that you need to work on something. While there are emails that need answering and presentations to practice, be sure to focus on using your time for personal interactions. And they don't always have to be formal-great ideas and connections come from coffee with new colleagues or jokes at a poster social. Now with the poster social starting I should get off my laptop and back into the social universe. Good luck to those of you finishing off the SETAC meeting and for anyone with an upcoming conference,whether its a first-time meeting or sixth-time meeting! Tomorrow is my conference presentation so I'll tie up the lose ends of the post I made about making my conference presentation based on the five easy steps for making a presentation. So stay tuned for an upcoming post on how it went and how I used the five steps to make the best possible presentation. And now, time for beer and networking! Playing nicely with others: When success in science hinges on more than just what you know10/21/2015
I think it’s safe to say that most of us have benefited from Jorge Cham’s PhD comic series even if our research and general productivity hasn’t. It’s easy to spend an afternoon scrolling through the comic archive and thinking Yep, been there, done that, seen that. His all-too-real depictions of situations strike a chord with many aspects of life working in a research laboratory. One of his recent comics resonated for me on two separate occasions. Originally posted on Sept 4th, I think I actually laughed out loud when I first saw this one:
I’ve seen far too many similar warnings posted in the lab, office, or shared kitchen, reminding us all that equipment belongs to one person and one person ONLY, or reminders that ‘your mother doesn’t work here, so clean up after yourself’. I’ve received a fair amount of scorn from lab managers and senior grad students or post-docs for using a piece of equipment without signing the log book about the 2 minutes I spend on the machine. I have borne witness to a wide array of emails on department and even college-wide email lists chastising someone for a minor infraction or something that could have been handled more maturely and directly (instead of involving the entire department). While Jorge Cham might lead us to believe in his comic that grad school isn’t kindergarden anymore, sometimes I feel like we’re back in elementary school all over again, but this time with the mantra of ‘sharing is good’ replaced by messages on snarky post-it notes indicating that if someone doesn’t clean up their mess they’ll be promptly sent to the 3rd circle of hell.
While it’s easy to laugh about situations like this, these attitudes in academia, and in scientific research as a whole, can hold us back from making progress in our work. I was reminded of this comic a second time last week when I found this article “How the modern work place has become more like preschool”. The article is not comic material but instead discusses the reasons for the increase in the number of jobs requiring interpersonal skills. While the loss of many ‘unskilled’ jobs may not be of concern to someone holding or working toward a PhD, in today’s competitive workforce there are WAY more PhDs than ever before. The traditional place of employment, academia, can’t make homes for all of us, and those that are trying to get into any sort of permanent position will be competing against a long list of other applicants, some with more publications, more grants, or more relevant experience. Interpersonal skills and how you work with others in a team setting can make the difference in you landing your dream job versus you landing just any job. The Nobel-prize winning economist James Heckman wrote a paper on the relationship between cognitive skills (e.g., intelligence as measured by aptitude tests) and non-cognitive skills (e.g., motivation, perseverance, self-control, etc.) and how these two factors correlated to endpoints related to success in life: getting a 4-year degree, how much money you make, etc. While there are quite a few conclusions that can be drawn from the results, depicted as surface plots over the two-dimensions of cognitive and non-cognitive skills (scroll to the end of the paper), the quick take-home message is that it takes more than just being smart to succeed. It’s a combination of how smart you are as well as how well you make it through life’s challenges and how you interact with teachers and peers. There is a strong need in today’s workforce, and in science especially, for people who can empathize, see others emotions, and respond to them appropriately. The New York Times article goes on to describe the reason for its title: “Children move from art projects to science experiments to the playground in small groups, and their most important skills are sharing and negotiating with others. But that soon ends, replaced by lecture-style teaching of hard skills, with less peer interaction. Work, meanwhile, has become more like preschool.” This is an all-too-true situation for those of us in the scientific fields: we spend our time in high school and undergrad gaining in-depth knowledge on a topic before we graduate. Then for those of us that decide to continue our studies, the world suddenly changes: the bulk of our time is now spent in lab meetings presenting our research, learning a new protocol from a lab mate, collecting data with a collaborator, or revising papers with our advisor. While there is always a part of your research where you will work independently, the collaborative atmosphere is much more prevalent after your undergraduate studies. It’s here that the natural sciences such as biology and chemistry can learn a lot from engineering programs. A bachelor’s degree in engineering is designed with the knowledge that after graduation most engineers will work in teams on large projects. As a student, group projects may seem tedious, but they provide experience with necessary teamwork skills such as how to divide tasks based on the members’ skills and knowledge. As such, students who will end up as professional scientists could also benefit from team projects. Just like how trends in the general workforce are leaning away from hiring people that can only do manual labor tasks, scientists need to hone their teamwork and collaborative skills in order to set themselves apart from the rest of the crowd. Another section of the NYT article describes a situation that many of us have likely faced already: “Say two workers are publishing a research paper. If one excels at data analysis and the other at writing, they would be more productive and create a better product if they collaborated. But if they lack interpersonal skills, the cost of working together might be too high to make the partnership productive.” This is an example of something that happens all too often in academia. If people know that you’re a genius at what you do but know that you can’t be bothered to sit in a room with other people and work together on a problem, who do you think they’re going to hire for the project manager position or ask to help write a grant with them? As stated in the NYT article, “Cooperation, empathy and flexibility have become increasingly vital in modern-day work.” Likewise, science has become a world of collaborations: large-scale international grants, multiple PIs with teams of graduate students and post-docs, data that requires expertise from several areas of knowledge, or a complex physical infrastructure (such as the particle accelerator at CERN). Science does not work in a vacuum, especially in this day and age where so many of the questions that remain to be answered are pressing and complex. As professional scientists we need to learn how to play nicely with the rest of the class. As you build a network of collaborators, you’ll find that this will be much easier if you earn people’s respect for who you are both as a scientist and as a person. While non-cognitive skills and ‘politeness’ lessons may not have been covered since your time in kindergarten, you will spend your entire life outside the classroom being evaluated on this skillset. It’s your responsibility to be aware of how you work with others and your strengths and weaknesses outside of your basic foundation of knowledge. To give some guidance, I’ve compiled a few things to keep in mind in order to help you play well with others. - Visualize any collaborative venture as a team effort. When you work in a group, look at people’s skills and expertise and think about what components each member can contribute. Keep in mind who will be timely with their efforts, who will need additional support, and who can be trusted to finish their contribution independently. - Foster an environment for sharing your research. Take ownership of your research but don’t keep it to yourself. Talk about ideas with your lab mates, your PI, as well as researchers completely outside of your research group. Seek out new perspectives on your work even if it’s not a formal collaboration by sharing insights and data with your peers and people outside your lab. - Your mother may not work in your lab, but pretend that she does. Moms tend to give good insights on how society expects us to behave. Even if you’ve been out of her house for a while, keep her recommendations in the back of your mind when it comes to how you conduct yourself (and the next three bullets are certainly mom-approved!). - Be nice to everyone. No matter what level of lab/office hierarchy, be they technicians, office staff, or administrative personnel, being friendly and cordial to people even when you don’t have to be will make your day-to-day life easier. It’s not just about being nice to your PI but to the people who will bring you deliveries, get your paperwork sorted so you can get paid, and who may or may not look past office deadlines in order to help you out. - Think before you speak, ESPECIALLY in emails. There will be a lot of tricky situations you’ll be faced with: scientists that don’t respond to emails, challenging your findings, or demanding more than was agreed on in a grant proposal. You don’t need to be snarky or defensive, and most issues can be managed politely without the need for overly strong wording. Remember that your emails can very easily get forwarded to a department head or saved in someone’s inbox, so use some thought before you send them! - Pay no mind to jerks. You will run into people that you won’t like, ones who won’t work well as a team or who will continually seem to poke you with a stick. Don’t worry about them, and as your teacher or mom said: mind your own business, at least when it comes to letting people interfere with your work and your mood. Do your best to try to establish a professional relationship as needed, and if that person is truly caustic then find other teammates to work more with, and be comforted by the fact that they’ll likely run into later issues with finding collaborators and colleagues in their own careers. Academia can feel like a ‘don’t touch this it’s mine’ kind of world, where the good guys just can’t win. There will inevitably be people that make messes or that won’t be nice to you. How can you set yourself apart from this preschool mentality? By setting an example through your courtesy and kindness. Focus on establishing a positive attitude for teamwork and collaboration, and work on the transition from a mindset of ‘don’t touch this it’s mine’ to ‘it’s nice to make friends!’ Your research now as well as your career in the future will be better off for it!
“Network, network, network!” Networking is often touted as the most important thing that graduate students and young researchers should do, even early in their careers. While it’s easy for people to say over and over again how important it is and to generally understand its importance for professional development, what’s not as clear is how networking in scientific research actually works, and how you should go about networking effectively.
How exactly do I network? is a pressing question for students putting together the final touches on their dissertation and for post-docs and entry-level researchers who are running short of days on their contract. The elusive nature of networking can become readily apparent while attending a conference at during one of these crucial times, seeking out potential employers and setting yourself up for the next stage of your career while navigating through the busy crowds at poster socials. While some people seem to be natural at attracting collaborators and colleagues, for other it’s not as easy. For most of us, collaborators and potential employers won’t just appear from thin air, and networking is not always something that comes naturally, especially for those of us that prefer to keep to ourselves or who feel more out of place when interacting with groups of people (e.g. introverts, myself included!). Before we think further on how to network, we should first think about what networking is. Instead of rushing off to Webster, though, let’s turn to something that’s been pretty successful with its networking, by definition: the Internet. In addition to being many a source of most of the information we consume each day, with an array of activities ranging from productivity to procrastination, the Internet is also the perfect model for professional networking. The infrastructure used by telecommunication systems are designed with communication in mind, with the end goal of making purposeful connections between people and places. As nerdy as it may sound, we can actually use the infrastructure of Open Systems Interconnection models (OSI; more nerdy stuff here) to get a better picture of what networking is, and give us a road map of how we can actually go about doing this important yet somewhat nebulous professional task. 
It's time to get extra nerdy with the seven layers of OSI/professional networking analogy
1. Physical layer
In the OSI model, a physical connection corresponds to the medium that allows the message to be transmitted, in this case electricity flowing through an Ethernet cable or the electromagnetic waves of wifi. For the wifi example, while there isn’t a solid physical connection, your computer has to be using the correct frequency and within range in order to get any signal. In professional networking, the physical connection is any sort of connection between you and another person, a connection that allows for mutual interaction and for being in their presence. It doesn’t have to be a physical or in-person interaction at first, the medium can be LinkedIn, a quick wave at a conference or workshop, or the fact that you have their email address in your contacts list since you were on the same email exchange about another project. The key is that this layer allows you to interact with the other person and to begin the next steps towards networking more fully. 2. Data link layer This layer relates to a reliable transmission of data between two nodes. It’s the same progression as with networking: you may have had a quick handshake at a conference dinner, but can you say you’ve really met them? For professional networking, this step means taking your connection further by reaching out to them with a bit more than just a ‘hello’ or a handshake. The key with this layer is to begin the process of active communication, with the goal of speaking the same ‘language’ and being on the same page. Whether it’s collaboration, a job, or career advice, this is the stage where you introduce yourself and start making a connection between yourself, your goals, and how the other person can transmit and receive back to you more reliably. Another key with this step is not expecting too much too early: don’t expect that a person you’ve never had an actual conversation with to hand you a post-doc. If you are interested in learning more about their group, present your goals and intentions but ask if you can talk or meet in person to learn more about their research, and for them to learn more about you, before you can expect much else more out of the networking relationship. 3. Network layer This is where things get more complicated in the OSI model: it becomes managing multiple nodes of information and routing information to and from the right places. After the initial contact, there will be a lot of back and forth about your problem and where to go forward. At this stage you probably won’t get a direct answer to your question or request, but may instead hear things like “Oh, so have you worked with Professor Smith?” “Did you read the paper by Smith et al 2014 on this topic?” The key here is to use your information and your connections to further expand your base network and increase your knowledge of potential contacts, focusing on suggestions and connections suggested by other colleagues. 4. Transport layer Once you’ve established a larger base network in step 3, you can have a more reliable movement of requests/data/information between yourself and your base network. You can then reach out to people and get more specific information on how to do what you are setting out to do and who you should be talking to. At this stage you’ll also have better luck with expanding your network further and for requesting more things like jobs or ongoing collaborations, because once people have established trust with you they are more likely to pass on your messages and requests, or forward along contact information to other colleagues, if they have some knowledge of you and your goals. The goal here is to establish a trusted connection between you and your contacts by demonstrating that you are a trustworthy, connected, and reliable person. This will enable you to take off in the next steps to grow these relationships even further. 5. Session layer With a set of trusted contacts in mind, you can now arrange a purposeful communication session: schedule a meeting on skype or at a conference to discuss research, draft a proposal for a grant, or ask about a research position. As in the OSI model, this will involve a lot of information exchange back and forth, so be ready to manage a lot of input coming in as well as meaning output being sent to them. With this step, you should be ready for a purposeful discussion that will lead you to your goal, and while the actual meeting doesn’t have to be 100% focused on the topic at hand, you should strive to achieve a result from this interaction by setting out with a goal and purpose for the meeting. 6. Presentation layer In OSI, this is where data gets translated, and for you and your contact this is where you both can showcase your ideas, ambitions, and intentions. Aim for clarity in the discussion: be sure that you know exactly what you’re getting out of the exchange, whether it be a collaboration or grant application or job, and that your continued interactions with your contact are also clear from this step forward. Have a plan for what you want to say, listen closely to your contact, and define the means in which you’ll both move forward together. 7. Application layer At this stage you’ve achieved high-level connectivity, and by doing so have achieved your original goal set out when you started your initial networking strategy. Whether this is a collaboration, a job, or a purposeful discussion about a paper with a new colleague, it’s the start of a continued deeper discussion between you and your new connection. The key with achieving your goal is to avoid skipping layers: you need to gain trust from connections beyond a quick handshake at a conference dinner, and you need to an appropriate venue and agreement on objectives and goals before you can pitch a grant proposal. Achieving the required trust, context, and clarity won’t get you a job or a paper 100% of the time, but it will certainly help. They key is to remember that you must build up a network of people who trust you and who understand you and what you’re doing, which is why it’s always recommended to do this earlier in your career rather than later. So now that we’ve covered the networking framework, I’ll share a few practical tips to get you started. These tips and tricks have helped me, a natural introvert who shies away from crowds and speaking out loud to omuch, to gain a wide network of colleagues and collaborators that I’ve met through conferences, advisory councils, and late-night scientific cocktails. One advantage of introverts is that we are good listeners, and as you’ll learn when you start talking to others about science is that people love to talk about their work and themselves. So the first piece of advice: let them talk! - Don’t be afraid to just say ‘hi’: Especially if you don’t know someone well, don’t feel like your first interaction has to be very formal or have some over-arching goal like a post-doc. If you have someone’s contact information, or bumped into each other at a workshop and didn’t have a chance to talk but you want to learn about the person more, don’t be afraid just to email them and say that you’re interested to learn more about what they do and who they are as a scientist. - Plan ahead: Especially if you’re meeting someone at a large conference, set a date and time to catch up with them, even if it’s just a casual discussion. It will help you make sure the meeting actually happens, as with conferences people tend to get busy and pulled each and every way to talks or meetings with colleagues. If you want to keep it more informal, go for a coffee or a walk instead of a sit-down meal or a relaxed after-conference drink, since it gives you more flexibility in terms of scheduling and is less of a time commitment for both of you. - Keep it casual but make sure you get to business when you need to: Especially when meeting someone more formally for the first time, don’t start the conversation too direct. Talk about the conference, the city, the latest loss/win of a local sports team etc., etc. Making connections is as much about getting someone to respect your work and your professional persona as much as it is having a person like you and feel comfortable around you. Break the ice as need be, then to avoid making the conversation too long-winded (especially for busy professionals) get straight down to the matter at hand in a clear yet un-rushed way. - Ask good questions: People like to talk and to be listened to, so obviously asking questions is the best way to get people excited about a topic. At the same time, you’ll get to learn more about them, how they think, what is exciting for them in terms of research, etc. Knowing someone better by hearing their side of the story, and letting that person share their story, can make your relationship one built on trust and understanding, not just mutual scientific interest. - Be ready: You may only get a short amount of time for your meeting, so be ready to say what you want and have a clear purpose or aim for your discussion. Obviously you shouldn’t bust out the notecards (might make it seem a bit too rehearsed), but prepare a couple of take-home sentences ready to fire off. This is especially good if you end up having to give a ‘elevator talk’, or telling a summary of what you do and what you want to do in a matter of 30 seconds or less. Being prepared will make your time count and your message stand out, even when the other person heads home after a busy week at the conference. -S tart now, no matter what stage you’re at: Building a network and establishing trust will take time, so starting early in your academic career will make it easier when you are actually looking for a job. Get involved with your favorite scientific society, or outreach groups in your university, and start talking to everyone and everyone about your research and your goals. You never know where you’ll find the connection that will lead you to your next job, or how a quick conversation about rugby and mass spectrometry can lead you to landing your dream job. Start now and cast a wide net for the best results! Apart from a lot of persistence and a dash of optimism, there is no perfect formula for networking. Some attempts will pan out, other connections will fade out quickly, and people you randomly talked to might surprise you by connecting you to someone with the golden ticket for your career. By thinking about how to build connections, using the Internet as an analogy, and approaching new colleagues and collaborators in an open, engaging, and well thought-out manner, you can build a network of trusted peers who will trust you back and help put you somewhere you’re aiming to be. So best of luck and happy networking, and for those of you heading to SETAC Salt Lake City, your first drink at the opening reception* is on me! *Drinks at the opening are usually free at SETAC (and hopefully still are, otherwise I’m soon to go broke!)
In previous posts I laid out five (plus/minus one or two) easy* steps for developing a scientific presentation. For today's post I'll be going into more detail about the preliminary work that you should do before you set off on making a perfect** presentation. As an added bonus, you'll get a sneak-preview of my presentation at the upcoming Society of Environmental Toxicology and Chemistry (SETAC) North American annual meeting located in the ever chic and always stylish capital of Utah, Salt Lake City. So not only do I get a blog post from my efforts, I'll have already put some time and effort into my talk before I get to the meeting. That's what we call in science a win-win situation, and in my case even better than free pizza at a seminar you were already actually planning on going to.
*Easy: Remember that nothing good in life comes that easy, as evidenced by the fact that I spend 3 hours making 4 slides for this talk. **Perfect: In the end I'll probably end up getting nervous and making a sarcastic comment about how my bipolar membranes look like lollipops, but that's OK, because the story is what’s important and the story is what they’ll remember. Step 0. Make a story board For my SETAC presentation, I get 12 minutes for the talk and 3 minutes for questions and answers. Following the presentation rule of thirds means the first 1/3 is background/broad appeal, the second 1/3 is in-depth details and concepts for people in my field, and the last 1/3 is my novel contribution to the field. Because of this, I printed out blank Powerpoint slides in groups of four. I'll focus on having 4 minutes of background information/introduction, 4 minutes of detail-oriented methods and ideas relevant for my results, and 4 minutes of my actual results. It may sound like a small amount of data, but having given a good overview of the big picture of my project, as well as a bit more in-depth review of relevant methods will make the data I show more clear and understandable, and therefore more memorable. 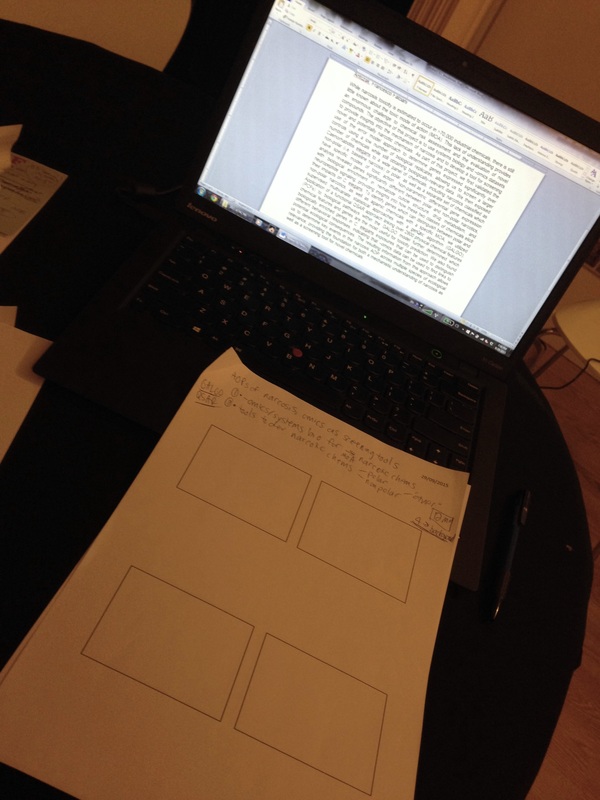
My storyboard set-up, complete with conference abstract so I could remember what I was supposed to present :P
With my storyboard printed and ready to go, I started off by going back to the original conference abstract to make sure I set off to present what I said I was going to present. I started with putting two things in my mind: the objective of the work to present in my talk and my audience. Writing down your objective again before starting on slides helps focus your mind on the bigger picture of what you want to present. In my case, the objective of the data for my talk is focused on the molecular mechanisms of narcosis toxicity and developing new screening tools for different classes of narcotic chemicals (as part of my post-doc project with Unilever). My audience in this case is one I know quite well: SETAC regulars who will be coming to the session on '-Omics technologies and their real-world applications.' There will be quite a few people in this audience that I'll know personally, and others whose work I'll be mentioning in my slides. No pressure!
With my audience and objective laid out, I set to work on the slides. Following the rule of thirds, I started off with background information/broad appeal, to get everyone on the same page. While most of this audience will know about concepts like gene expression, risk assessment, and adverse outcome pathways, I want to make sure that someone popping over from an environmental chemistry session will also be able to follow along. At the same time my subject area is not one of the hotter topics at SETAC, so a bit of background in terms of biology and relevance is necessary here. 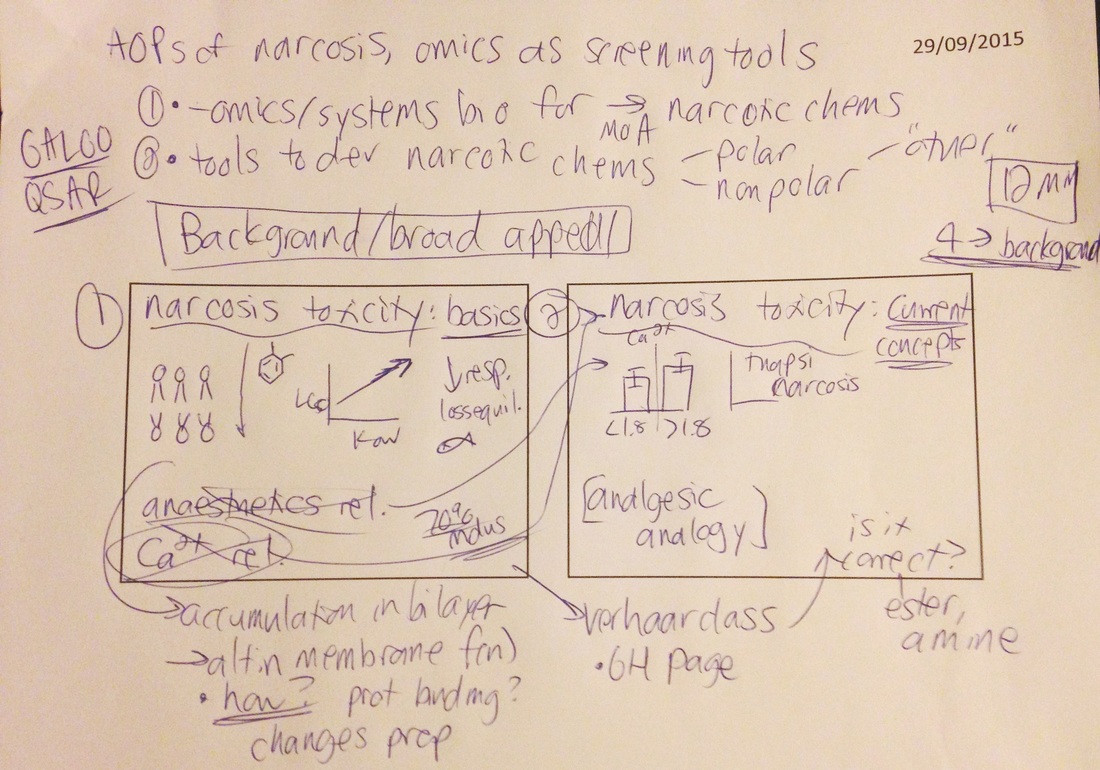
My project objective/topic and my two introductory slides. Bonus: my terrible, terrible handwriting!
I decided to start off my talk with a description of narcosis toxicity. As I said, this isn't a hugely hot topic in my field, so I planned on making the first two slides as an opportunity to teach anyone in the audience who hasn't heard it much before. I split this into two parts, one focusing on the basics/textbook toxicology concepts of narcosis, and the second going into more details on recent papers and new understandings. Here I also sketched out what to put on each slide, including my lollipop-esque membranes, and what figures from the literature I wanted to include.
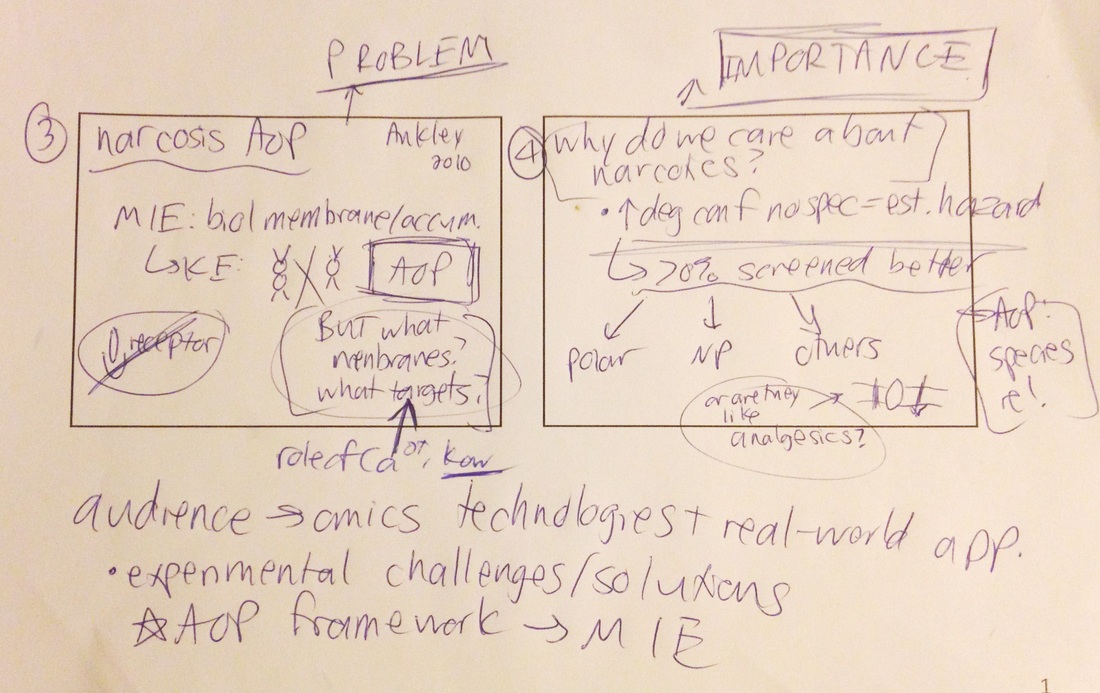
Introducing the problem and its importance
So now that I've put everyone on the same page about what narcosis is, I'll then present the specific problem I'm looking into, in this case the lack of understanding of the molecular mechanism of toxicity. This will be in the context of work done by senior scientists who will most likely be in the audience, so I've made a note to cite their work. This brings in concepts that I discussed in more detail in Step 1 of the perfect** presentation, where you get people's attention by describing a problem in your field, why that problem is important, and then in the next slides how you solve it. For this talk I present the problem and then talk about how knowing mechanisms of toxicity are relevant for accurate risk assessments for chemicals, especially narcotics. Hook, line, and sinker!
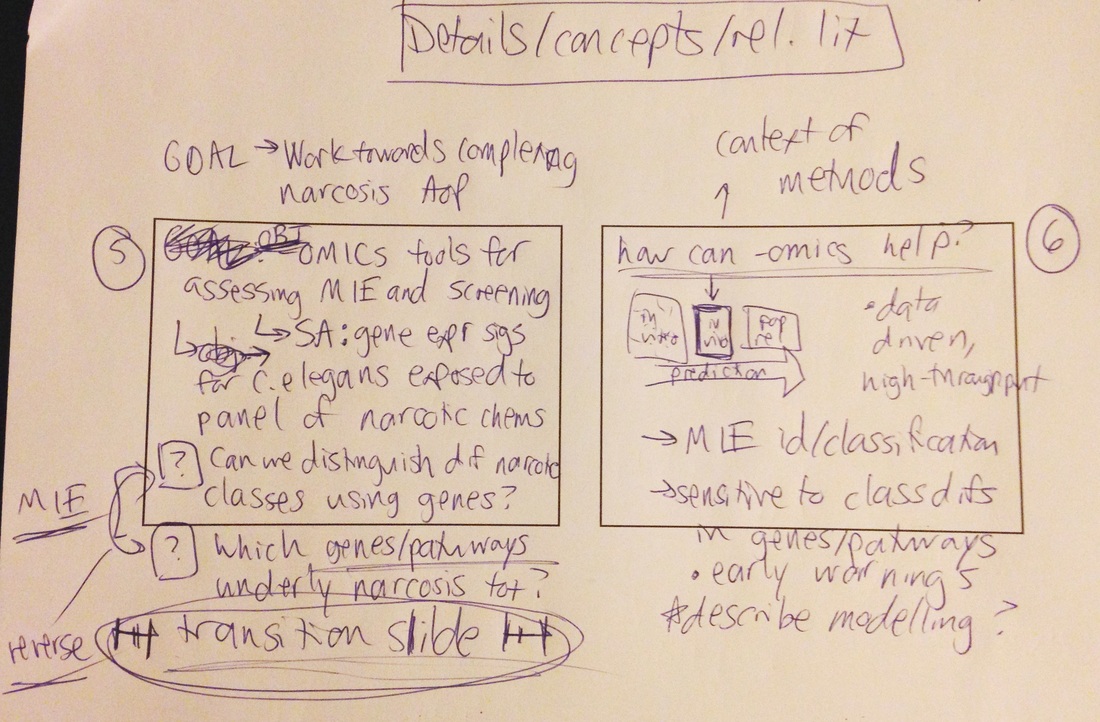
The transition into a new section and additional context of the project that's more focused on people in my field
At this point I've now laid out the objective of my project, the specific questions I'm asking, and how they will address the issues I presented in the introduction. This slide (#5) also comes at a time where I am transitioning between background information and getting into the nitty gritty of my project. You can skip trying to decipher my bad handwriting and read more about Step 2 and how you present setting out to solve the problem you just talked about.

More in-depth information for people in my field, as well as my project's experimental design
After the transition slide and describing my project's objective and questions, I then go into a bit more background information to provide context for the data which I'll show next. This includes one slide (#6, see panel above) on how high-throughput molecular techniques can help address these questions, and one slide (#7) on my model system and why we chose it, including background information of toxicity of narcotics in my model system. I then give a schematic of my experimental design and will talk here about the analytical methods I'll be presenting. I also made a note to myself to make an 'emergency' slide with details of one of the methods of my project. As its only a small part of what I'm doing but something that a few people might question, I'll make a slide to have at the end in case I get a question after the main part of the talk.
So with those eight slides I'm now 2/3 done with my talk. The last four slides will be data and conclusions, and to prevent any earth-shattering findings from escaping into The Internet too soon (and to motivate any SETAC meeting attendees to actually come to my talk, on the last day of the conference in the late afternoon!), I'll save those sketches for when I make the real thing. Step 1. Set the stage and Step 2. The Hook To give you a sense for how the introduction slides actually ended up looking, apart from my terrible scribbling, here are how they turned out so far. I added animations in the actual presentation so the content doesn't all come up at once, which also allows what I say and the components of each slide to come together in a more logical progression. As an aside, I have no idea the appropriate color for biological membranes, so I am currently thinking of new ways to see if I can make a bipolar membrane not look like blueberry lollipops. To be determined for the next blog post.
As you can see, there's a lot you can convey with lollipops and arrows, and remember that at the same time that your slides will be on screen you'll also be speaking (as scary of a concept as that seems). Think about how your words and your slides can work together, and keep to a minimum any redundant or unnecessary text as well as figures or diagrams that may be too detailed or too small to see or understand clearly. Before jet-setting off into your experimental design, take a slide to transition from introduction to experimentation while at the same time giving your audience a clear vision of what you are doing and what scientific questions you are answering (e.g. the hook).
While I've touched briefly on some of the last three steps while working on my storyboard (the story, take a bow, and break a leg), we'll save a more in-depth analysis of these for when we get closer to the actual meeting. It will also give me a chance to finish making my data slides, and to practice my talk before giving the real thing to a live, scientific audience, including but not limited to collaborators, experts in the field, and potential future employers. Again, no pressure. Until next time, happy storyboarding! |
Archives
August 2018
Categories
All
|
Addtext

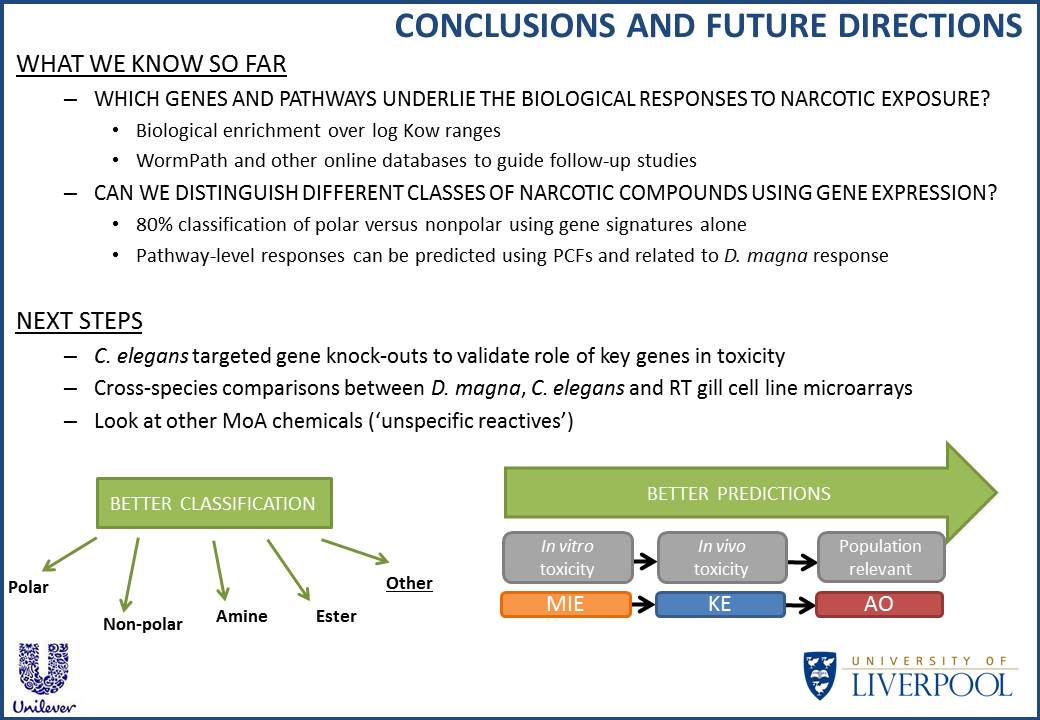
 RSS Feed